Yesterday I got an email about configuring VXLAN. I was in the middle of re-doing my lab so I figured this would be a nice exercise. First I downloaded vShield Manager and migrated from regular virtual switches to a Distributed Switch environment. I am not going to go in to any depth around how to do this, this is fairly straight forward. Just right click the Distributed Switch and select “Add and Manage Hosts” and follow the steps. If you wondering what the use-case for VXLAN would be I recommend reading Massimo’s post. VXLAN is an overlay technique and encapsulates layer 2 in layer 3. If you want to know how this works technically you can find the specs here. I wanted to create a virtual wire in my cluster. Just assume this is a large environment, I have many clusters and many virtual machines. In order to provide some form of isolation I would need to create a lot of VLANs and make sure these are all plumbed to the respective hosts… As you can imagine, it is not as flexible as one would hope. In order to solve this problem VMware (and partners) introduced VXLAN. VXLAN enables you to create a virtual network, aka a virtual wire. This virtual wire is a layer 2 segment and while the hosts might be in different networks the VMs can still belong to the same. I deployed the vShield virtual appliance as this is a requirement for using VXLAN. After deploying it you will need to configure the network. This is fairly simple:
Now the vShield Manager virtual appliance is configured and you can go to “https://<ip addres of vsm>/. You can login using admin / default. Now you will need to link this vShield Manager to vCenter Server:
Now you should see some new shiny bright objects in the left pane when you start unfolding:
Now lets get VXLAN’ing
An agent will now be installed on the hosts in your cluster. This is a “vib” package that handles VXLAN traffic and a new vmknic is created. This vmknic is created with DHCP enabled, if needed in your environment you can change this to a static address. Lets continue with finalizing the preparation.
Now that we have prepped the host we can begin creating a virtual wire. First we will create a network scope, the scope is the boundary of your virtual network. If you have 5 clusters and want them to have access to the same virtual wires you will need to make them part of the same network scope
Now that we have defined our virtual network boundaries aka “network scope” we can create a virtual wire. The virtual wire is what it is all about, a “layer 2″ segment.
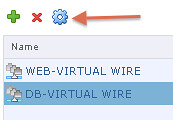
In the example below you see two virtual wires… Now you have created a new virtual wire aka VXLAN network. You can add virtual machines to it by simply selecting the network in the NIC config section. The question of course remains, how do you get in / out of the network? You will need a vShield Edge device. So lets add one…
Now if you had a virtual wire, and it needed to be connected to an Edge (more than likely) make sure to connect the virtual wire to the Edge by going back to “Networks”. Select the wire and then the “actions dial” and click “Connect to Edge” and select the correct edge device.
Now that you have a couple of wires you can start provisioning VMs or migrating VMs to them. Simply add them to the right network during the provisioning process.
"Configuring VXLAN…" originally appeared on Yellow-Bricks.com. Follow us on Twitter and Facebook. Available now: vSphere 5.1 Clustering Deepdive. (paper | e-book) |